Select five videos to download Here
Final Cut Pro
Step 1: Opening Final Cut Pro
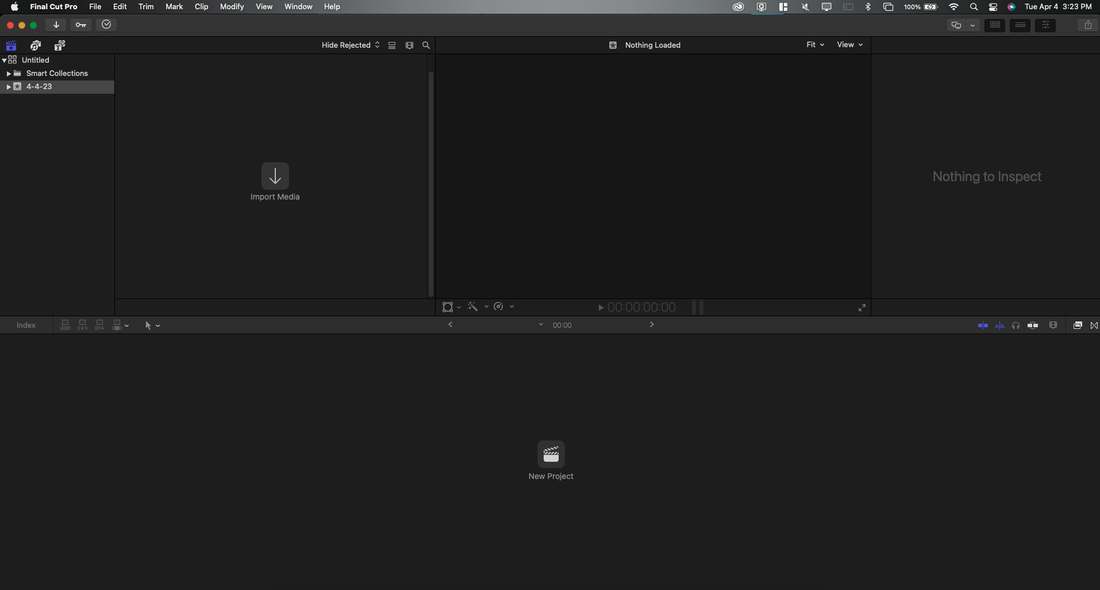
Open Final Cut Pro on your Mac by clicking on the application icon in the dock or by searching for it in Spotlight. Once it opens, you'll be greeted by the main interface.
Open Final Cut Pro on your Mac by clicking on the application icon in the dock or by searching for it in Spotlight. Once it opens, you'll be greeted by the main interface.
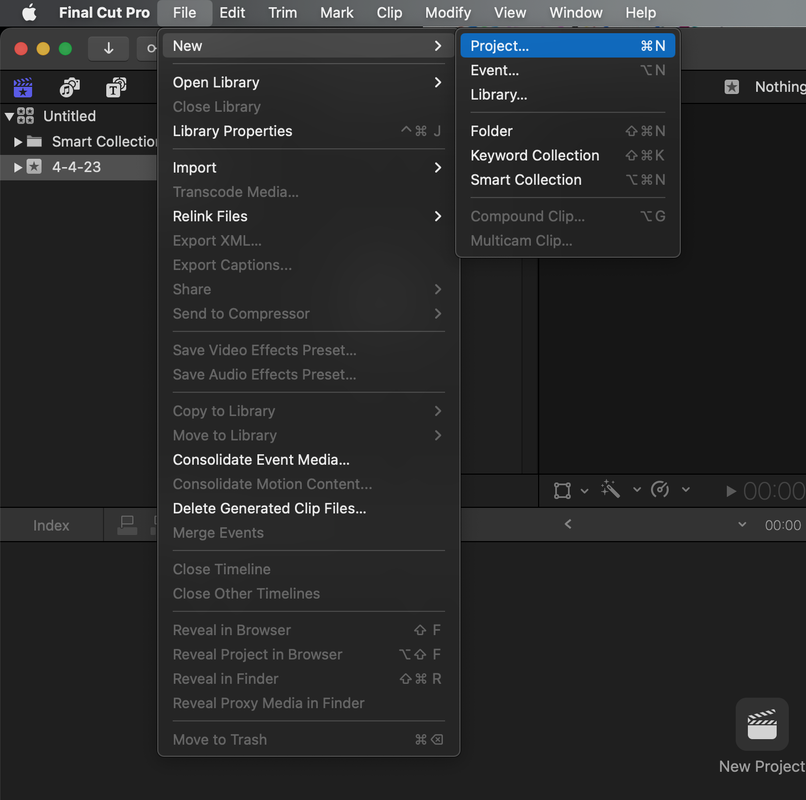
Step 2: Creating a New Project
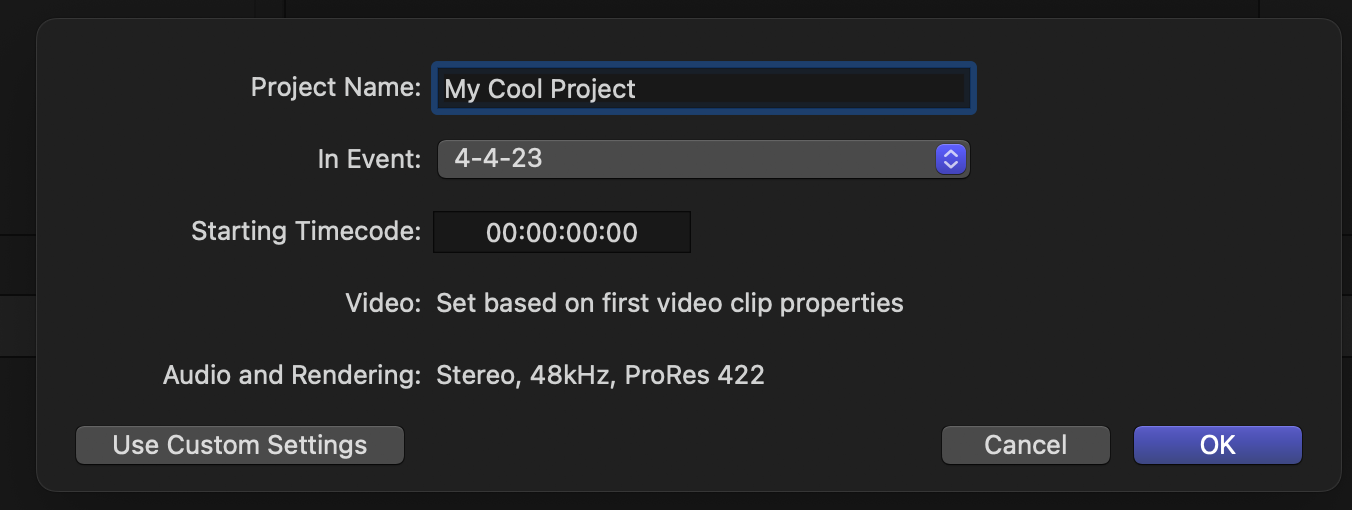
To create a new project, go to "File" > "New Project" or use the keyboard shortcut "Command + N". Give your project a name and select your desired video resolution and frame rate. Click "OK" to create the project.
Step 2: Creating a New Project
To create a new project, go to "File" > "New Project" or use the keyboard shortcut "Command + N". Give your project a name and select your desired video resolution and frame rate. Click "OK" to create the project.
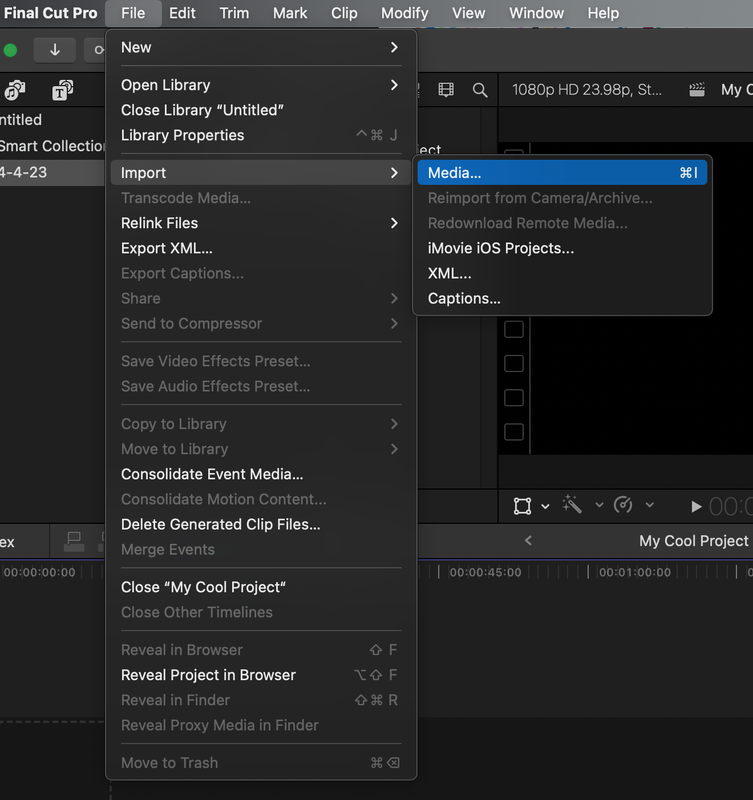
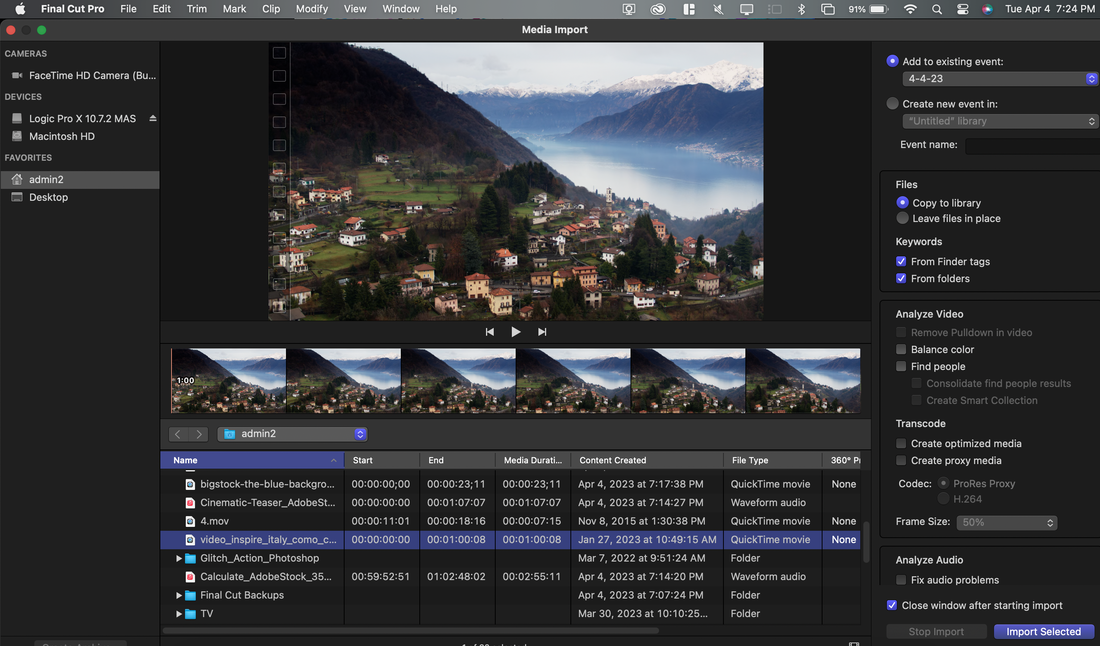
Step 3: Importing Media
To import media into your project, go to "File" > "Import Media" or use the keyboard shortcut "Command + I". Select the media you want to import and click "Import Selected" to add it to your project.
To import media into your project, go to "File" > "Import Media" or use the keyboard shortcut "Command + I". Select the media you want to import and click "Import Selected" to add it to your project.
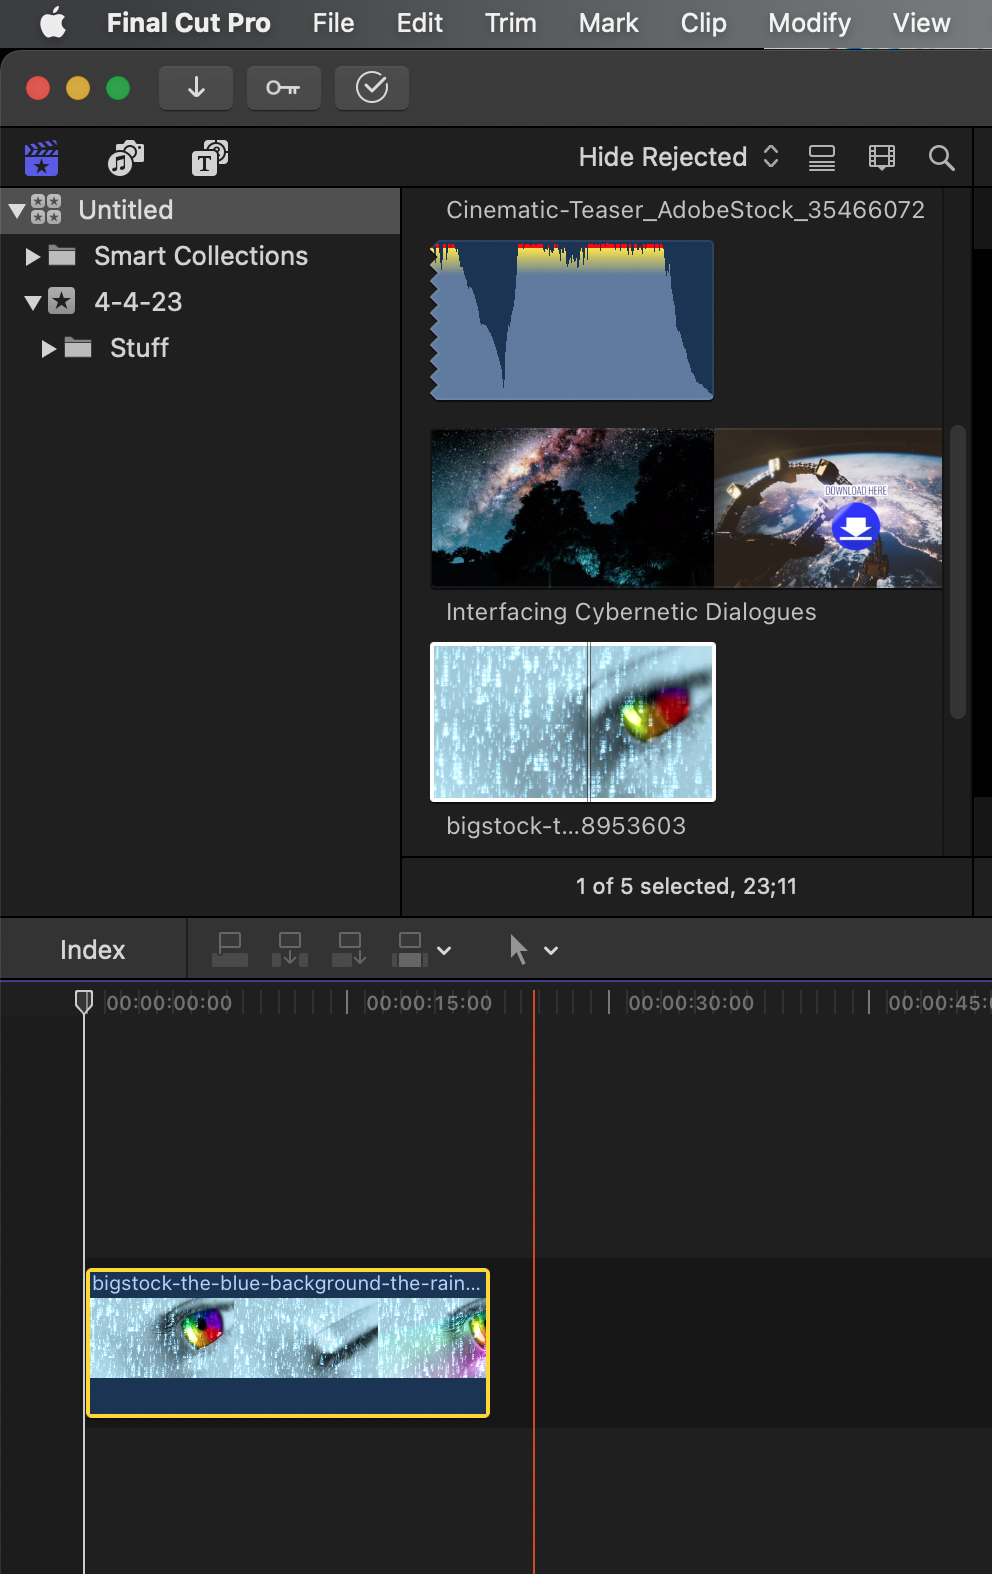
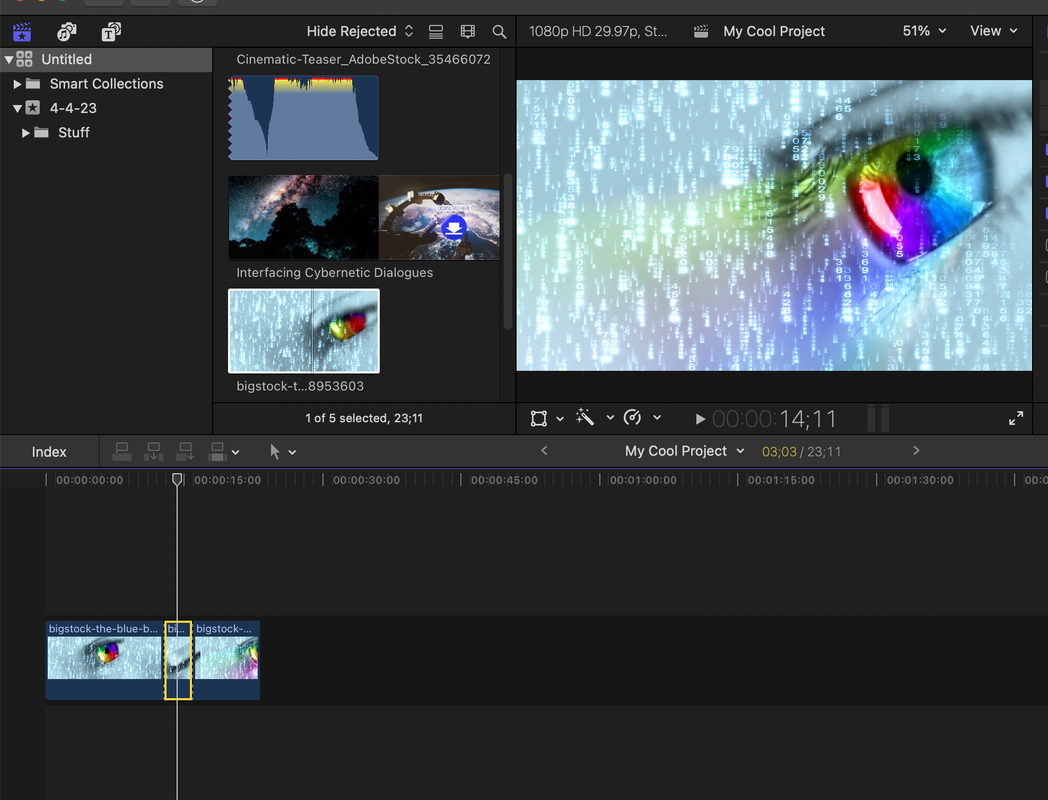
Step 5: Adding Clips to the Timeline
To add clips to your project's timeline, select the clip in the "Event Browser" and drag it to the timeline.
To add clips to your project's timeline, select the clip in the "Event Browser" and drag it to the timeline.
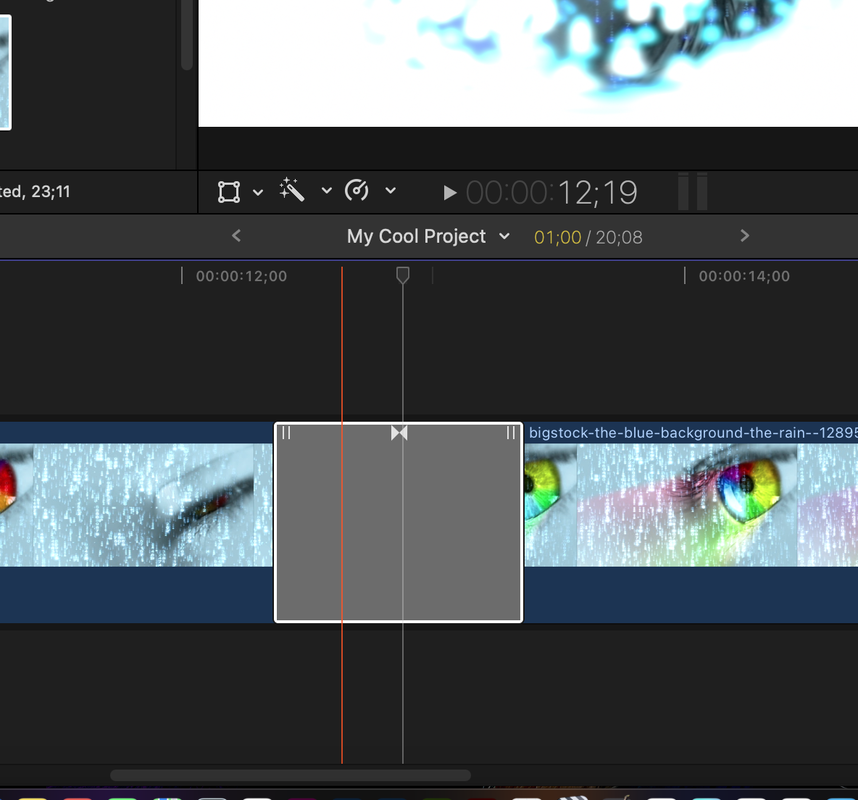
Step 6: Trimming Clips
To trim a clip in the timeline, drag the playhead to where you want to clip then use Command + B (for BLADE)
Move the playhead again until you find the next and repeat. Select the section you want to remove then hit delete.
To trim a clip in the timeline, drag the playhead to where you want to clip then use Command + B (for BLADE)
Move the playhead again until you find the next and repeat. Select the section you want to remove then hit delete.
NOTE: Comand + will Zoom IN on the timeline and Command - will Zoom Out
Step 7: Adding Transitions
To add a transition between two clips, select the "Transitions" tab in the "Browser" and drag the desired transition onto the edit point between the two clips.
Step 7: Adding Transitions
To add a transition between two clips, select the "Transitions" tab in the "Browser" and drag the desired transition onto the edit point between the two clips.
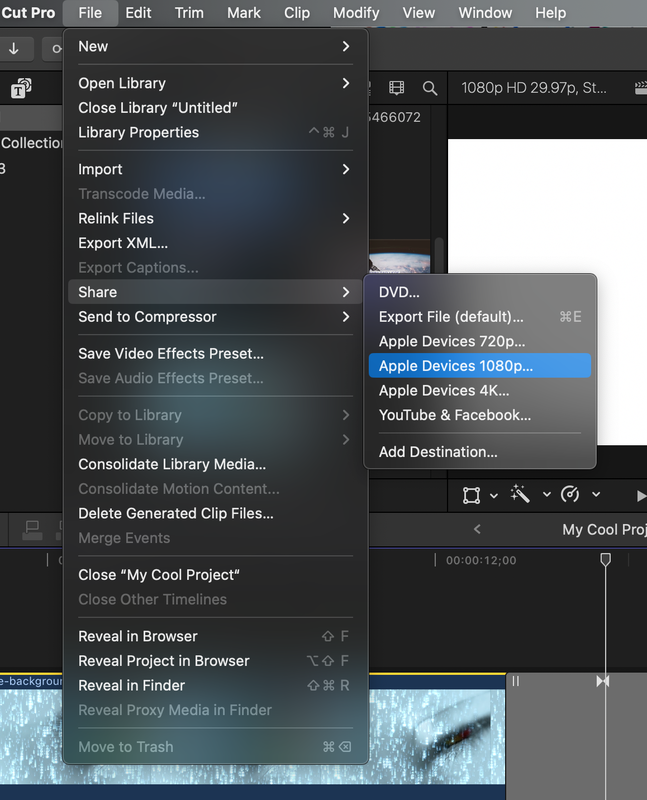
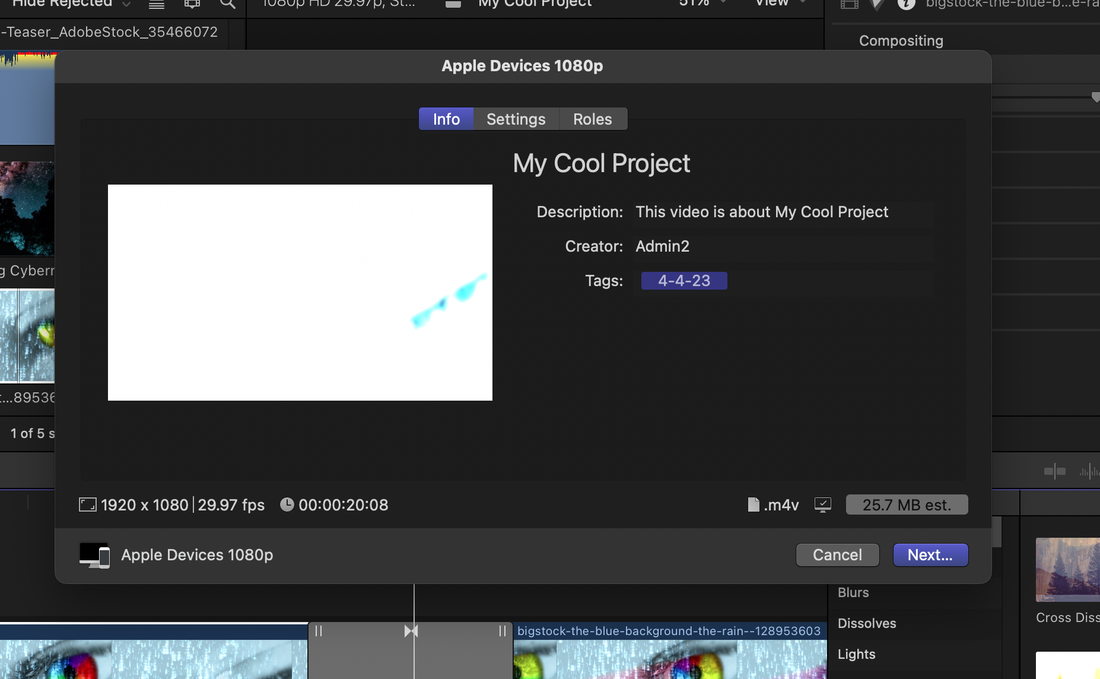
Step 8: Exporting Your Project
Once you're finished editing your project, you can export it by going to "File" > "Share" or using the keyboard shortcut "Command + E". Select the desired 1080P and click "Next" to export your project.
Once you're finished editing your project, you can export it by going to "File" > "Share" or using the keyboard shortcut "Command + E". Select the desired 1080P and click "Next" to export your project.
When your file is done - you'll see this notification:

|
|
